Classes and Libraries
Introduction
This tutorial will teach the
process of constructing classes, as a method to manage sub-models.
This document augments the chapters in the Basic Technology
document covering Classes and Library. It assumes that the
following directory structure has been set up in <VS>/VS_AR
- User_Libraries
- Components
- Libraries
- Models
In other words, the following paths are used in this document:
- <VS>/VS_AR/User_Libraries
- <VS>/VS_AR/User_Libraries/Components
- <VS>/VS_AR/User_Libraries/Libraries
- <VS>/VS_AR/User_Libraries/Models
The following top-down design steps are followed in this exercise:
- Creation of the top-level block diagram in which an instance of the class will be used and in which the class can be verified
- Specification of the hierarchical block’s interface
- Specification of the hierarchical block’s functionality
- Verification that the hierarchical block works properly
- Conversion of the hierarchical block into a reusable class
- Possible methods of instantiation of reusable class
- Use of the VS GUI for instantiation
- Creation and use of Libraries for storage and instantiation
- Creation of hierarchical libraries
Short Excercise on Creating Classes
Step 1: Create Top-Level Block Diagram
- Open a new block diagram by selecting menu File->New->Block Diagram Editor
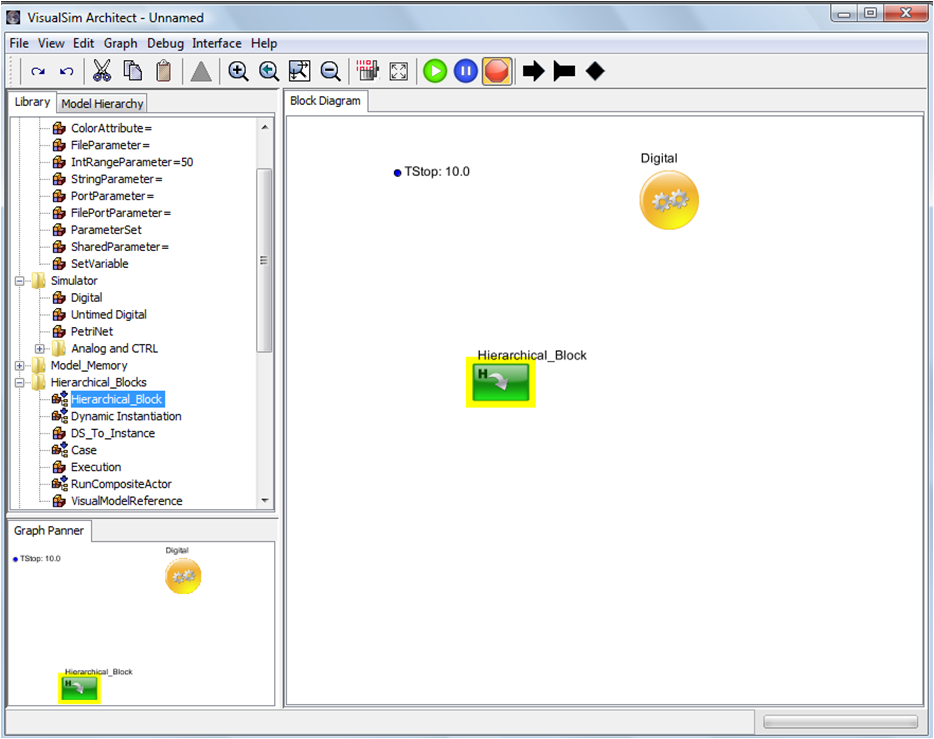
- Instantiate a model parameter by dragging ModelSetup->Parameter= onto the block diagram
- Right-click on this parameter and select menu Customize Name
- Type “TStop” as the name of the parameter and hit the “Commit” button
- Double-click on this parameter and specify a value of 10.0 (feel free to change this value as you experiment with this model)
- Instantiate a “Digital” block from the Library pane ModelSetup->Digital
- Double-click the “Digital” block and type in “TStop” for the block parameter “stopTime”
- Instantiate a “Hierarchical_Block” from the Library pane ModelSetup -> Hierarchical_Block

Step 2: Specify Ports for Hierarchical Block
- Right-click on the Hierarchical Block and select menu item Customize-> Ports
- Click on the “Add” button and add an output port as shown below

Step 3: Specify and Verify the Functional Behavior of the Hierarchical Block
- Right-click on the Hierarchical Block and select menu Open Block
- Instantiate a model parameter by dragging ModelSetup->Parameter= onto the block diagram
- Right-click on this parameter and select menu Customize Name
- Type “TStop” as the name of the parameter and hit the “Commit” button
- Double-click on this parameter and specify a value of 10.0
- Instantiate a “Digital” block from the Library pane ModelSetup->Digital
- Double-click the “Digital” block and type in “TStop” for the block parameter “stopTime”
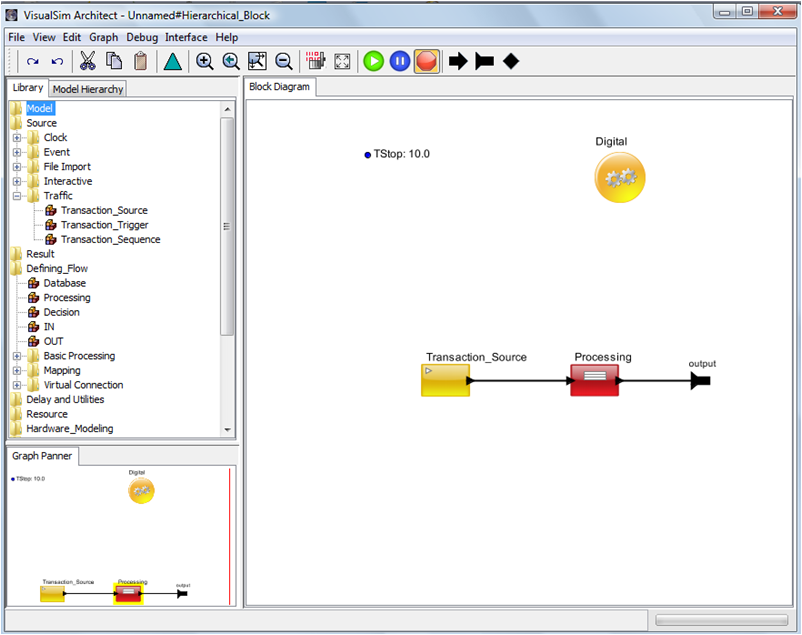
- Instantiate an instances of the “Traffic” block using Traffic->Traffic
- Instantiate an instances of the “Processing” block using Full Library -> Defining_Flow->Processing
- For the “Processing” block, type the following in block parameter “Expression_List”
- input.Time_Generated = TNow
- Connect the blocks/ports as in the following figure
- In the top-level diagram, type in “TStop” for hierarchical block parameter “TStop”
- In the top-level diagram, verify that the hierarchical block is working properly.

Step 4: Create a Class using the Hierarchical Block
- In the top-level diagram, right-click on the Hierarchical_Block and select menu Convert to Class
- Right-click on the Hierarchical_Block and select menu Open Block
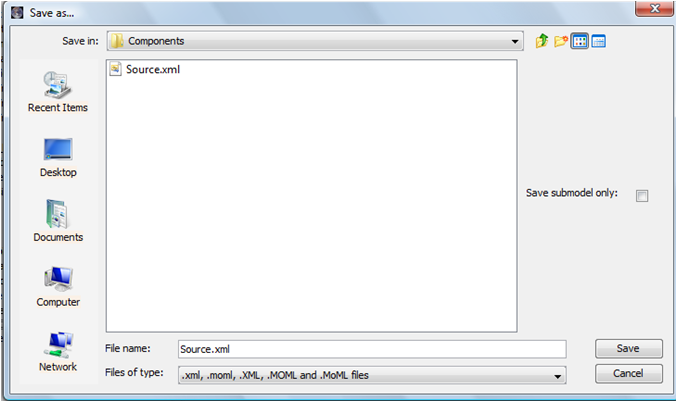
- Inside the hierarchical block, click on menu item File -> Save As
- Select “Save submodel only:” (see figure below)
- Save the block as “Source.xml” in location <VS>/VS_AR/User_Libraries/Components

Step 5: Instantiate a Class from the VS GUI
- One way of instantiating a class is to use the VS GUI
- For example, open a new block diagram by selecting menu File->New->Block Diagram Editor
- Select menu Graph -> Instantiate Entity
- In “Class name:”, put location User_Libraries.Components.Source as below

Step 6: Create a New Library
- A better way to use a class is
to have it be an item in a Library. The user can create a library
under the User_Library folder.
- It is best to create the library within the confines of the UserLibrary.
- To create the library, first right-click on User_Library in the Folder and select ‘Open for Editing’
- Next select
Graph->InstantiateEntity and edit ClassName:
VisualSim.moml.EntityLibrary. This will create a new folder. Make
sure the Library name does not end in a numeral.
- Convert this library to a Class by Right-click on the block and Convert to class.
- Open this Hierarchical Block and Save As with sub-model selected.
Step 7: Populating the New Library
- Open the library file by doing a File->Open and selecting this file for editing.
- Drag-n-Drop items from the
UserLibrary or other directories into this window. You cna also include
other classes by Graph->InstantiateEntity.
- Note: Make
sure there is a Digital simulator in this library folder. This is
needed or you will receive an error each time you open VisualSim.
Step 8: Import this New Library into the User_Library
- Right-click on User_Library and select ‘Open for Editing’
- Using Graph->InstantiateEntity and select the library created above
- Save
Step 9: View this New Library in the User_Library
- Restart VisualSim
- The new library will be visible in the User_Library


